Tuesday, 25 November 2014

All sewn up

Hello everyone, as I'm writing this I'm sitting listening to the rain on the windows,  it has quite a soothing rhythm which is helping me relax and get into weekend mode. I love that feeling of switching off ready to begin our two days off.

I hope your weekend was fab and that you enjoyed yourselves whatever your plans. When you read this it won't be the weekend as I didn't want to blog this card until after the lady's birthday had arrived.

The card is for my sister in law and as she loves to sew I thought I would do another sewing themed card. Last year I made this.


I wanted something different this year but still related. Now! I'm not sure where I first saw this but I thought it was lovely. It greatly inspired me to make the card. Once I'd made the card I researched around and found it.

It's

 by Jennie Atkinson and you can check out wonderful blog here.


The ideas flew round round. I thought about it for a few days, then I forgot about it, but as time was getting near it was time to start, so I gathered the pieces I had thought about using.


I used wild honey distress ink by Tim Holtz for Ranger on the background silk and Vintage Photo to colour the cheesecloth. I  used Weathered Wood to distress the burlap before sewing together.


I played around with my elements 


Once I got parts to work for me I machined the areas I wanted seen.


I kept building up my elements stitching and sticking 


Once I was happy with how it looked I made my tile to hold the sentiment. I cut a piece of floral card and distressed it first in Vintage Photo and then inWeathere Wood. I stamped my sentiment onto tissue paper and then stuck it in place once it was dry I poured UTEE over it forming a layer. Once this was dry I cracked it to add to the aged look.

The finished card


I am going to enter this card into A Vintage Journey blog challenge. 

Thank you for visiting today, take care,

Debsxx
SHARE:

Thursday, 20 November 2014

Stabilo pencil review

Hi everyone, I have been asked to several times to share some information about the Stabilo all pencil.

I cannot compare it to other pencils that will go on most surfaces as I found this one and as it works so well stuck with it.

I came across the pencil by watching tutorials by Dina Wakely on her workshop site. I bought several of them from Amazon.

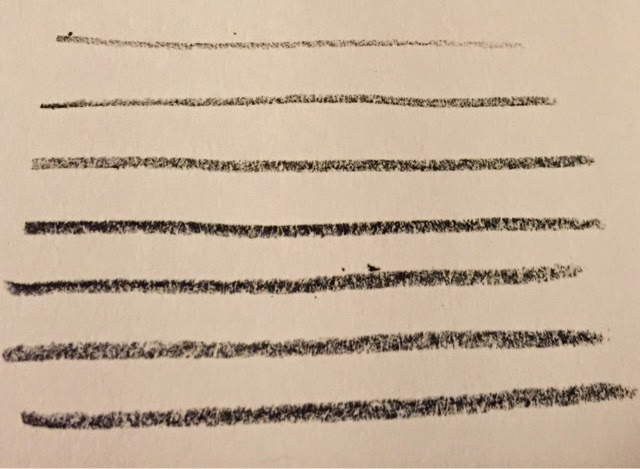
It's a nice pencil to hold and I enjoy using it. Below I have shown the outcome of different pressures using the pencil. It is water soluble so one side you will see the pencil activated. 


Sorry this so blurred!

It has a soft core and so needs to be sharpened regularly you can get a fine point again below shows the different thicknesses you can get.


One disadvantage is that it is difficult to rub out so I will often sketch my drawing first and when happy go over with the stabilo to give depth to my shadows.

The great advantage is that it works really well over acrylic paint so great to use over inky painty backgrounds 


I hope this helps a little thanks for the visit xxx

Debs xxx

SHARE:

tag you're it!

Hello everyone, chuckling to myself. Do you ever get stumped what  to call your post. I do sometimes hence the silly title tonight. Well now I've got you  here I show you the tag I made to enter two challenges.

The first is Anything Vintage at that's Crafty go have a look at what their design team up with, lots of inspiration and the other is the Artist trading Post again with great inspiration from their DT.

I took a #10 tag and spray it with seedless grape tattered rose and wild honey spray stain from Ranger and using my stencil wiped off some off the stain ( I first saw this done by Dyan Reavery on you tube)


I then used the same stencil and sprayed tea stain through randomly across the the tag.

I used a photo from lost relatives  which I stuck on some fabric that had been distressed with weathered wood distress ink. 


I then added crackle paste through a baroque stencil in places and once that was dry sprayed with worn leather Colorbloom and then highlighted with treasure gold in white fire. 

I sprayed some roses in the worn leather and added them as well as some lace and a butterfly to finish


The finished tag with my stamped and white heat embossed sentiment which is by Douglas Horton


Thanks for stopping by take care and I'll see you soon

Debsxx 

SHARE:

Craft Speed Challenge - new Challenge

Good afternoon everyone, hope you are all well, and  a special welcome to my new followers.

Today over on the speed craft challenge the theme is anything goes which was picked by the very talented Keren Baker. Please pop along to the speed craft challenge  where the DT inspirations are fabulous . There are some great project there and all completed within 15 mins. How fab is that, so come on you crafty people a little art every day keeps the inspirational juices flowing. 

And we now have a sponsor how great is that. I don't know about you but I'm always looking out for vintage images to use in my projects and now you can win some which fantastic. So come get crafting! 
Take a look at the lovely Julie's shop and if you really need anything pop along to her Etsy shop 

Free Vintage Images

My project is a very simple one today I only needed my stabilo pencil and a journal page.

I started my timer  I find it easier to work backwards in time as I always know how much time I have left rather than having to calculated it the other way it works for me.


I didn't sketch this first just dived straight in. Sometimes this is good as happy mistakes just add to the overall effect but as you cannot rub out the pencil you do everything even when the mistakes aren't as happy lol. 
Here she is mistakes an all 


And I finished her in good time 

So come on pop over there now and join in the fun.

Thank you for your visit, take care 

Debsxx

SHARE:

Wednesday, 19 November 2014

Sharing the love

Evening everyone, hope you are well and fighting fit now as the days appear so short and nights soooo long. I love being out walking this time year but don't like being in when its so dark and gloomy. 

Anyway Monday night I was at craft club and was lucky to win two raffle prizes and so thought I'd give one away. 

This is the set 


All you need to do for me is follow my blog and leave me a comment so I know you entered. On Friday I will pick a number at random and one lucky person will be the new owner of thi rubber stamp set.

Good luck
SHARE:

I was dreaming again

Hello everyone, I hope you are all well this afternoon. Thank you for taking the time to pop over to see what I've been up to. I would also like to say a big hello and welcome to all my new followers. Thank you for joining me on my journey.

A few weeks ago I was asked to play along on the Dragondream tag it on challenge. The theme was the colour purple and the letter X. Please check out the design Team's creations on the link above.

For my tag I chose a Xmas theme (although I don't like to use Xmas it did fit the theme) I first sprayed the card with purple Colorbloom I love this colour and it's so shimmery. 


I used Archival ink in watering can and JOFY mini 07 from Paper Artsy to form part of the background and then stamped again but this time in black.


I used some bourbals that I die cut from Sizzix and played around until I liked their placement. 


I sprayed the bourbals in a darker purple and silver heat embossed areas around the edges and the bows.


I stuck them down and added my sentiment and finished it off with some purple thread 


Thank you for visit today, take care and come back soon. 

Oh and spread the word there will be a little give away tonight on my blog! 

Bye for now Debs xxx


SHARE:

Sunday, 16 November 2014

Journal page just because

Evening everyone, it is a bit late but I wanted to finish this page. I hope you all have had a good weekend. I have struggled all week with inspiration and motivation so just played with inks. 

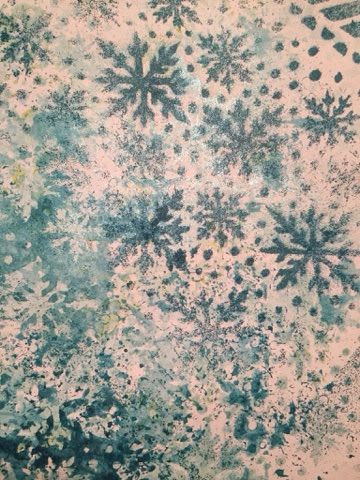
In my journal I experimented with decoArt Media sprays as well as some dylusions and Colorbloom in various shades of green blue and yellow

I continued to build up the colours 


I then used  Andy Skinner and a Dina Wakley stencils with ink in the same colours 

Once this was dry I added some snow flake through a Lin Brown stencil from Paper Artsy 


Once the White was dry I sprayed the flowers with media spay in yellow 


I then spritzed the top of each flower and then quickly sprayed the areas with Colorbloom in Peony I let some of the colours drip.


I stencilled grunge paste through an Andy Skinner stencil sprayed with ink and then used white fire treasure gold 


Once completely dry I added a black outline to the flowers.


Finished with a sentiment


I loved playing with the inks it is sooo much fun 

Take care Debs xxx


SHARE:

Tuesday, 11 November 2014

Some cards at last

Morning peeps. Today I'm just showing a few cards. Yes I have started at last! And yes I know it was about time. I was inspired my mate Helen who used master boards for her cards. I thought this was such a fab idea that I made my own.


These were my three master board which are 12x12 I cut them down into 6x4 so got six from each board.

I used some die cuts from sizzix and a mini stamp from Paper Artsy.. 

So here they are 


I know have 17 which is not a bad start to the ... Erh however many it is I have to make. The list grows each each lol. Take care all and I'll see you soon.

Oh PS.  I've not been around much this last week as this infection is really holding on and making me so tired. I'm just about managing to get to work but by time I'm home I'm falling asleep. Hopefully I'll soon be back to health and have some energy. 

Debs xx


SHARE:

Thursday, 6 November 2014

Speed challenge

Afternoon lovelies, I hope this Thursday afternoon is working out good for you. I'm starting to feel better which is fab as I hope by the weekend I'm back fully fit, well healthy fit lol.

I'm bringing you my DT sample for the Speed Craft Challenge which starts today. The theme is nice and easy 'Anything Goes' so pop over to the challenge to add your entry. Use a timer for your project and stop it at 15 mins and take a picture of your project. Then if you haven't finished take a picture of your finished project with how long it took you. 

Here is a very simple one to start you off

I gathered my stash


Started my timer


I don't have step photos, but I took a small tag and my stencil and spritz colorbloom spray in purple on the stencil, after a few seconds removed the stencil and rolled my kitchen roll over the the tag to mop up excess ink. Keep the sheet from the kitchen roll as this can be used on projects later.


I distressed the tad edges with black soot distress ink and then stamped the background with a Paper Artsy Mini tag from the JOFY range and black archival ink. I dried this to heat set it which makes it permanent. 

And to finish I stamped my feature again from Paper Artsy.


I added some glitter and a tie to finish

All in the grand time of 

So I could have made two in the 15 mins allowed, so come on you can do it too.

Look forward to see what you make.

Take care and see you soon

Debsxx


SHARE:
BLOGGER TEMPLATE CREATED BY pipdig