Sunday 26 January 2014

Sunday Tag

Good evening everyone. I have been playing most of the day and this is my last piece.

I decided to make a tag to enter in a challenge at fashionable Stamping Challenges
 ( I was in their Saturday Spotlight this week)


I was sent two sample tags with an order I recieved from the funky junky (thank you ) so thought I would use one here. I used distress ink round the tag in walnut stain and Victorian velvet.


I grabbed some bits and bobs and started to play  around until I got things as I liked. I used some crunchy waxed paper from Paper Artsy and die cut some flowers also from Paper Artsy, I have had this die for quite a while but this is the first time I have used it.  I cut two flowers down and painted them with vintage lace I then dabbed Spanish mulberry on them. I scrunched them up and added a brad to them forming a flower.  I added a touch of treasure gold to the edges.


I added a metal flower which I had attached a small chain to and hung two hearts I had cut from filmo clay again I used treasure gold to colour. 


I cut out some butterflies and added silver sticklers and then stamped a face from crafty individual onto the tag. I then stamped a sentiment from dylusions and cut it up and stuck it on the tag. 


Im also entering this into these challenges

izazov - Monohromatski


Thanks for looking 

Hugs Debs xx


SHARE:

Very quick box


I wasn't going to do any more PA projects this week but caught the bug of the cube. Especially as my pals Sam and Lesley made one without the die.

So I cut mine out of mount board which I learnt was a mistake but I completed it anyway.

All materials are from Paper Artsy this is quid ink


I then used vintage lace and Spanish mulberry once dry I coated with metallic glaze. I chose to use Darcy uk stamps as I thought they would look great on my cube.

I edged them and then used the butterfly and heart stamps.

I had problems with the mount board as it cracked where it was folded and did not have the neat finish I was looking for but I added some treasure gold which gave it more of a vintage look, and I was happy with that.

Thanks for looking 

Hugs Debx 


SHARE:

Saturday 25 January 2014

DLP wk 3 and 4

If you read last week's blog you will know that I am joining in with the documented life project. This week I have managed to catch up with week 3&4 so tomorrow I can start the week on the current week and not feel I have to rush. 
Week three's prompt was to upcycle an envelope that had come through the post. Today I recieved a very small parcel in an envelope from America so decided to use that. 


In the envelope was a card thanking me for the order and earlier in the week I had a package delivered from a favourite online craft sight which also added a little free gift and a card. I decided to add both these cards to the envelope after I had distressed the envelope and used the free stamp to decorate.

I made a hole through the envelope and page and tied the envelope to the page with some ribbon. Under the envelope I distress so the page and added some stencilling from my new very much loved layering stencils from Tim Holtz. 


I thought having the envelope able to hold things would be a great little storage pouch for bits and bobs I might want to keep.

Week four

The prompt for week 4 was to write a page of journalling and then cover it up leaving only one word showing. Well as I'm learning to break the rules I left 3 words showing - still not a real rebel yet.

I covered the writing with white gesso and once dried played with Gelatos I then used stencils and a bay wipe to remove colour to give some interest ( really love this technique) 


My words I also added some washi tape and a small amount of doodling to finish it off.

Thank you for looking as always would love to read your comments 

Debs xx
SHARE:

Something a bit different for me


It has been an amazing week over on the Paper Artsy blog, so much talent, we were spoilt. Earlier in the week Ellen Vargo was a guest designer. She did three amazing posts using a brayer and fresco acrylics. you can see Ellen's creations here.

I chose to have a go at Ellen's second post which was cards. I used an A3 piece of water colour paper adding several colours from the fresco' range from Paper Artsy.


I used the brayer and spread the colours out. I dried  this layer and then added more colours, but by now I had got excited and so forgot to take pictures.

I got the colours to how I wanted to see them and then added some printed tissue paper, in places some stamping in different colours and once dry cut the page into 4.


At this point I wasn't sure whether I liked what I was seeing the colours were dark and not my usual pallet. I decided that I would finish them and then decide. So next I attempted to add the black feature stamp and some black stamped foliaged but OMG it was so hard my ink would not stick to the paint

As you can see from this picture it is barely showing. So I made myself a coffee and thought about how to get round the problem. What I decided was to stamp the flowers onto white card and cut them out. I did for the four cards and used distress ink straight from the pad- with hindsight I would have used the fresco translusent paints as I think these would have given a more vibrant colour.

I stuck the flowers on and used a black pen to draw their out line direct onto the card. I used distress ink in black soot at the bottom of the cards dragging it up slightly to give the appearance of foliage and then added some fine lines in black.

I stamped some sentiments and mounted them onto black card and then mounted the whole thing onto white card. And here they are.


I decided I do like them and glad I was able to think of a way to save them from the bin lol

I hope you have enjoyed my process and look forward to reading your comments.

Hugs Debs xx
SHARE:

Tuesday 21 January 2014

DLP week one and two

Many of you will know about the Documented Life Project but those who don't, can find information in my previous blog.

I have been lagging behind but have added some pages to my  journal

I decorated the cover - I first jessoed the cover in white and then played with my Gelatos. Once that was dry I used a stencil and baby wipes to remove some colour you can see where I got this technique from here.  It is by Helen  Chilton

I then got out my primary elements adding colours here and there. I then played with pens and stamped some sentiments.


I have now added the week one prompt - my front door 


I printed it off onto normal copy paper and then added it to my journal page which I had brayed using Ellen Vargo's  technique and fresco acrylic paints - see Ellen's work on the paper artsy blog here.


I smudged snowflake around the door to blend it in and added some circles.


For week two it was a selfy - I thought long and hard about what I wanted to add and decided to go for my eye. I added an eye to a document and manipulated it to make it grungy but then played again 
Until I had a softer look; one I thought I could blend in.

I again used my brayered and frescos 

Loved these colours and then came my eye 

I added some blue and ginger and continued to play until I got the final look


Bit of a long post today hope you didn't get bored. Thank you for looking.

Any comments would be lovely to read x
SHARE:

Sunday 19 January 2014

Plaque

Happy Sunday everyone, I hope you have been enjoying your day. I have been in the art room most of the day playing. I made some moulds which I ended up throwing away as they didn't do want I wanted. I will have to give that another try!

I then used some moulds I already had and made some hearts and roses to use on projects. I also played with some clay. 

Then my attention turned to my documented life journal which, I haven't touched yet. I added some extra paper to a couple of months and decorated the front. I was inspired to do this by Lorraine Bell which you can check out for yourself here for a very small fee. I will put up picture's later but want to get this post finished as I want to enter it into a challenge at Paper Artsy which you can see here.

So back to my plaque. I was thinking of getting my UTEE out today so this became the perfect project.

I aged my plaque with crackle glaze and then stamped some borders and corners from the hot picks range from paper artsy. Next I stamped my centre piece. I distressed round the edge. In this photo you can see that I didn't line up the corners as well as I could which breaks the symmetry. Further on you will see that I added embellishments to off set the distraction. 


Next I added some roses and and metal embellishment. I added some treasure gold in white fire to the embellishments


then my utee. 


This is a very quick blog but I was running out of time and my OH was calling to say dinner was ready. 

Thank for looking Debx 

SHARE:

Saturday 18 January 2014

Casket


Afternoon everyone I hope you are all having a great weekend. Today I am sharing my little casket I created following Julie Ann Lee's creation on Paper Artsy blogg which you can see here. It really is worth checking out Julie Ann's casket because it really is fab and she is so lovely.

Well my casket is full of little secrets which in my imagination is owned by a forlorn woman whoes greatest love is missing. The caskets contains a map rolled up to protect it, as it has the place marked on it, where he was last seen. There is a post card from him, telling her how much he loves her. A crumpled note requesting a clandestine meeting before he he leaves, and flower from the garden where they met. There is a a tiny bottle with a clipping of his hair, and of course a heart to represent their love.

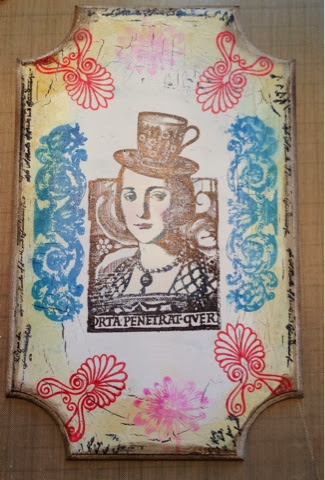
Now that's enough of my romanticism here is the casket. All the materials used are from Paper Artsy except the glossy accents and embellishments which are from various places.

The box is coated in sage and left to dry. I then stencil flowers with grunge paste on the top and again leave to dry.


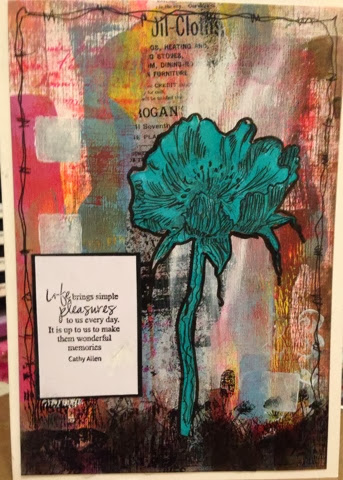
Next I coat the sides and parts of the top with crackle glaze and while this is drying, I paint my flower with a mix of sage and beach hut. I paint the box with the same colour and as it's drying watch it do it's magic. 

I coat the flowers with treasure gold and stamp onto the top and sides using stamps from this set, which I won in a blog challenge at Paper Artsy.

I'm adoring this set and have some ideas of what I want to use them for which I'll share later.


I added the flower and metal embellishment (Julie Ann creates a great feather but I felt my box was too small)


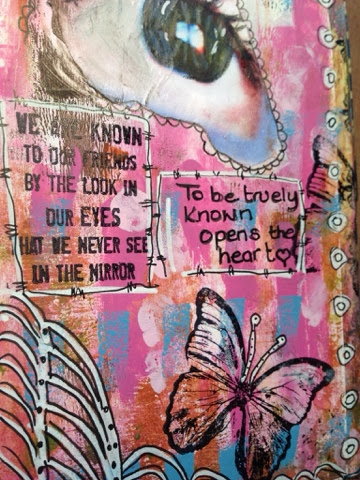
And now for the inside


Thank you so much for looking and as always would love to read your comments 
Hugs Debs xxx
SHARE:
BLOGGER TEMPLATE CREATED BY pipdig