Wednesday 28 February 2018

A note set for Paper Artsy

Hello everyone, how are things where you are? It’s been cold and snowy here, which for many is a nuisance and obviously it can be dangerous, but also so very beautiful. I’m  fortunate to have moved into my new home and be able to enjoy a few days off from work to enjoy the spectacular views. Feeling very grateful!

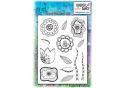
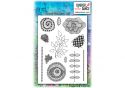
Also with with gratitude in mind I’m sharing a little project that is on the Paper Artsy blog using some of Sara Naumann’s new stamps. I really loved this set of stamps, and new straight away what I wanted to create.


I am fascinated with writing sets, you know the kind? Folded card with a design on with a matching envelope all kept in a pretty box, well this project is my take on just that. I’ve brought it bang up to date using a journal style folding book which opens to reveal the cards and envelopes. It also has a ribbon closure which winds round to keep everything in place.

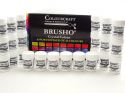
I used my favourite watercolours paints Gansai Tambi, by Kuretake, which are high pigmented gloss finish watercolours and come in some beautiful colours. I used a very simple technique of wet in wet, allowing the colours to mix and blend, finished off with a splash of gold. Theses backgrounds were perfect for Sara Stamps,  ESN, 23/24.

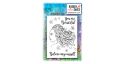
Here are some process shots and close ups


And there you have it!

I hope you like this set of cards and notelets and thanks for popping in.

Take care my crafty friends and I’ll see you all soon

Hugs Xxx


SHARE:

Sunday 18 February 2018

How to - recycling into Art

Hello to you all, today I’m over on the Rubber Dance Blog with a fab little how to, using recycled packaging! 


Why not pop over,  and see how this came together to create this lovely wall art which can anywhere in your home.

Take care for now
Hugs xxx


SHARE:

Friday 16 February 2018

How to - quick card

Hello everyone here’s another addition to my how to blog posts, and today I’m showing how to make your very own birthday card without stamps.


So I started with my background (I have limited supplies at this house, as most have gone to the new one) 

I taped a piece of mixed media card to my mat and blended some colour using Dyan Reaverly paints. Once this was dry with a Tim Holtz stencil and white paint I added to form my background.


I painted a piece of card white, dried it and then drew my flowers. This didn’t take me long as I’ve been drawing this style of flower since I was a child. Who knew 50 odd years later I’d still be using it to make a card. There are lots of tutorials on how to draw simple of flowers and I really encourage you to have a go.


I coloured them with my new Brush Pens from Fabre Castell, I have the big Brush Pens and love them so thought I’d invest in the smaller nibbed ones for the smaller projects. They work fabulously over any painted surface, as you have a couple of mins to blend but once dry they are permanent.

You can see that I didn’t mind going over the edges as I was going to cut them out (which wasnt the greatest cutting in the world as I had to use kitchen scissors)


Next I cut my sentiment using my cricut but a die cut or stamped one would work, or if you were really brave a hand written one would be perfect!
I covered mine with sparkles.


Some close ups


As previous stated the cutting was not good lol, but I tidied  up with a black pen as you can see on the finished card.


And another look at the finished card


I hope you are inspired to have a go yourself, how lovely to create something that you designed, this is going to my Mum who I know 
Will love that I drew and painted it. 

Hugs to you all xxx


SHARE:

Thursday 15 February 2018

Sew sweet

Hello everyone I’m here today to share this sweet card I made as reminder for the February challenge over on the Rubber Dance blog.


And here’s how!

I started with Brushos which I dried and then started my stamping. This set is Sew Sweet designed by my friend Katy Leitch for Rubber Dance.


I used the Brushos on my craft Mat to add colour to the different elements.


I am addicted to gold splashes at the moment so of course I added a few


I added some crystals to another piece of card so that I could stamp and cut out some buttons

And there it is


The stamps can be purchased from the shop and if you use this code DWFreeShip you will get free shipping when you spend over €15


I hope you enjoyed this post and would love to read your comments 

Hugs xxx


SHARE:

Friday 9 February 2018

Great blog Hop

                 Hello everyone, today I’m very excited to announce a wonderful collaboration between Rubber Dance and ColourCraft in a blog hop! 
Each day will showcase an array of  fabulous art from both teams using materials from both companies.


One lucky winner will receive both, a £25 voucher to ColourCraft AND a 25€ voucher to Rubber Dance.   
All you have to do is visit the fabulous designers from both teams and comment for your chance to win!  The more blogs you comment on, the more chances you have to WIN! (One comment per blog please.)   You have until 14th, February at 11:59PM Central Time to leave your comments, and the 
Winner will be announced on Rubber Dance Facebook page and Colourcraft’s Facebook page on Saturday 17th, February.  


Here is my creation

I really wanted to use cups in my make, and as I didn’t have any I designed some and then cut them out on my explore air2


Now I had my cups I chose my stamps I’ve listed those at the bottom along with all other materials 


I chose colours which I know would add contrast and interest. Starting with my backgrounds I carefully painted around the stamped images.


Next I used the ink to paint the images, I loved blending the colours to add shade by varying the value of the colour.
I measured the cups and Andrew cuts to allow them to sit inside each other


I knew I wanted to stick them onto yet another contrasting colour which I also added touches of Brushos to for more interest.


The background sheet was then mounted onto blue card which was stuck onto an actual card. I kept the blue card the same size as I didn’t want a white border. I designed my quote  cut it out, and arranged it on to finish.


To finish, once everything was completely dry using a black pen I added a border around my cups to give a stamped effect.
One last look at the finished piece.

Here’s what I used:


And now the links for today’s line up


I hope you have lots of fun dancing your way round this colour spectacular 

Take very good care
Hugs xx


SHARE:

Wednesday 7 February 2018

Little houses

Hello everyone, here I am again with more creative inspiration, this time for Country View Crafts. The them is Anything but cute and you could win £20 
To spend in the shop, and with all the new stuff coming out of Creativation 2018 which I know will soon be in the shop now is a great time to enter.

So today I’m sharing these little houses. I’ve had this die for ages but never got round to using it, so I cut myself a bunch out,  and have a ready stack.


So here’s what I did

Laying out the different pieces I decided to add lots of texture, using Craft Paste through a stencil.

Below is the roof pieces


And the body of the houses


Standing it up to get an idea of what it looked like. I throughly dried the paste with a heat tool


The paint I used was Chalk Mists , and here and there Gold


I added some washy tape for interest, and as the stencil I used created what looked like doors and windows I made these stand 
out with a black pen.


Again a touch of Gold


Material I used

Houses and Washi Tape - Tim Holtz, Sizzix
Grunge Paste - Paper Artsy
Stencil - Essentials no 1 ArtZone
Paints - Chalk Mists 13@rts
Gold - Zig Kuretake Gansai Tambi 

I hope you enjoyed this tutorial, if you have any questions please leave in the comments and I’ll get back to you

Take care
Hugs xx


SHARE:
BLOGGER TEMPLATE CREATED BY pipdig